Friday, October 07, 2005

Backing up the Recovery Agent Key

This tip is for Windows XP Professional only.

The Encrypting File System (EFS) is part of the Windows XP Professional OS, it allows users to easily encrypt/decrypt their data files. The way EFS works is Windows automatically creates the keys needed to encrypt and decrypt the files. Then when a file is requested by an application Windows uses the keys to decrypt the file, and when the file is saved it automatically re-encrypts it.

To prevent these keys from being stolen, they're encrypted and stored as part of the user's account. A problem will happen if the user account is deleted, all the keys for encrypting and decrypting the files will be lost. This means the user's encrypted files, will not be able to be opened.

Although, Windows does include a recovery agent key that can decrypt the data, just in case the user's keys are lost. When Windows encrypts a file it uses the recovery agent's public EFS key, as well as the user's EFS key. What this means is that the recovery agent's key can be used to decrypt the files if the user's key is lost.

By default, the local administrator account is the default recovery agent for computers in a workgroup. The domain administrator is the default recovery agent for computers in a domain.

To protect the integrity of the recovery agent's keys, they should be backed up on any system that uses EFS. To export the user keys from a system that is part of a workgroup:
  • On the local computer, log on using the local administrator account.
  • From the Run... command type, "SECPOL.MSC".
  • Expand the 'Public Key Policies', and then the 'Encrypted Data Recovery Agents' branches.
  • In the right pane, right-click the certificate, and select 'All Tasks Export'.
  • Choose Next when the wizard starts.
  • Choose Yes (Export The Private Key), and press the Next button.
  • Follow the remainder of the wizard using the default values, and specify a file to contain the key.
  • When the wizard finishes, copy the newly created file to a safe network share, or to a disk. If you copied the keys to a disk, make sure to store it in a safe location.
In the wizard, if you choose the option to remove the private key from the computer after the export is complete, you must restart the workstation or domain controller for the removal to be complete.

If you need to back up the recovery agent key for a domain, run DOMPOL.MSC on the first domain controller in the domain. Use the same procedure as above to export the key to a file.

Thursday, October 06, 2005

Choosing a strong password

Password security is going the way of the dodo. As computers become more and more faster, a programmer’s ability to write programs to guess your password is becoming easier. The great thing about passwords is the only software/hardware requirement is a keyboard, which is a requirement for using a computer. Although, the main problem with passwords is that they can be cracked.

There are lots of technologies promising to replace the password, but the only one that has made it somewhat mainstream is fingerprint scanners. These devices are not perfect and there is no universal set of hardware/software standards that all computers can use to access these devices. I believe this is the greatest obstacle preventing adoption of this technology.

Choosing a Strong Password
Although there is some good news, if you create a strong password and change it on regular intervals you can thwart most people’s ability to crack your password. Remember that passwords are your primary front line defense for protecting most of your personal and financial data.

You might have heard the term ‘strong password’ but might not be sure what it means. Basically a strong password is one that is difficult to guess. The attributes that characterize a strong password are:
  • Words not found in the dictionary.
  • Never use names of people, places, animals or things. Also avoid using words formed from personal information about yourself (such as your name, address, pet's name, spouse's name, etc.)
  • Composed of 8 or more characters (Note: the longer the password, the tougher it is to crack).
  • Composed of numbers (0-9), upper and lowercase letters (a-z, A-Z), and punctuation marks (!#$%!$%^&*). Try to substitute punctuation and numbers for letters.
For example a hard to guess password might look like: A1467!bnc@. To make a password easy to remember, pick a common word then change characters in that word with numbers and symbols: P@ssW0rd or M1cr0S0f+.

Password Handling
The biggest problems with passwords are that they can be tough to remember, the more complex the password (or the number them you have to remember). If you know that you can’t remember all them, it might be a good time to find a password manager that you trust to help you manage them.

Wednesday, October 05, 2005

Internet Explorer: AutoComplete Feature

By default, Internet Explorer's AutoComplete feature is enabled. AutoComplete remembers previous entries that you typed into the Address, and form fields. AutoComplete can also be used to remember your user names and passwords when you're prompted for them.

If you want to configure this feature, or turn it off completely then do the following:
  • Open Internet Explorer
  • From the Tools menu, select 'Internet Options...'
  • Click the Content tab.
  • Press the AutoComplete... button
From here you can enable or disable any of the features, by checking or unchecking any of the options. You can also purged the saved form or password data by pressing the 'Clear Forms' or 'Clear Password' buttons.

Tuesday, October 04, 2005

Managing Hardware Profiles

A little known feature of Windows is the 'Hardware Profile'. This feature allows you to enable or disable certian devices and networking settings when your laptop is docked in its docking station, or when its removed.

For example, if you have different network settings for your home and office, you can create multiple hardware profiles and select the one you want to use when your computer starts up.

To create a hardware profile, follow the instructions below:
  • Open the Control Panel folder, and double-click the System applet.
  • Click on the Hardware tab, then press the 'Hardware Profiles' button.
  • In the list of available hardware profiles, select the 'Docked Profile' or the 'Undocked Profile' and press the Copy button.
  • Enter a new name for the profile and press OK button.
  • Press the OK button.
When you reboot your computer, Windows will prompt you to select a hardware profile you want to use. You can customize the profile by enabling or disabling devices. Use the Device Manager to specify the devices that should be enabled or disabled for this profile.

Monday, October 03, 2005

Create an Autorun CD

Most commercial applications CDs that you buy will automatically start when you put it into the CD/DVD drive and close the door. This feature is called 'Autorun', it allows an application to be executed when the CD is first read.

If you want to add this feature to your custom CDs or DVDs, all you have to do is create a simple three line text file with Notepad. Then when you're done, save the as AUTORUN.INF in the root of the CD/DVD's directory.

[autorun]
open=setup.exe
icon=icon.ico

Where is says OPEN=, put the name of the program or web page that you want launched when the CD is put into the drive. Where is says ICON=, put the name of the icon file that you want to use for the CD when its displayed in the Windows Explorer. For more information on this subject see the results from the following Google search.

Notes:
  • Make sure not to include any drive letters when calling these files. All the calls to a file have to be relative to the files on the media.
  • If you're calling a non-executable files, such as an HTML web page. Put the command START.EXE in front the web page's name (i.e.: "open=start.exe example.html")

Thursday, September 29, 2005

Before Calling Technical Support

Sometimes calling technical support is a bigger hassle then its worth these days. Although, not all technical support people are one step above computer illiterate. I have talked to some really sharp ones over the years, but they're few and far between.

There are some basic troubleshooting steps that you can perform, before or while you waste 30-60 minutes on hold for someone to help you. These techniques can help eliminate the call in the first place.
  • If all else fails, save all your work, close all your applications and reboot your computer. If your computer will not let you reboot it, try pressing the Ctrl-Alt-Del keys. If that still doesn't work, try holding in the power button until the computer turns off. Although, if your computer is still not rebooting unplug it, wait 10 seconds and plug it back in (this is a step of last resort, and it is not recommended).
  • While your computer is turned off, if you have any external hardware devices (i.e.: scanners, hard drives, etc...) that you don't need turn them off and unplug from the computer. If you can't unplug a device or you just don't want too, make sure all the cords are properly connected. Check the Device Manager for unrecognized devices:
    • Check the device manufacturer's web site for updated device drivers and firmware. Also check if the site has a knowledge base of known issues that can help your problem. If you recently updated a device driver and you think its giving you problems try rolling it back.
    • Go to Windows Update and download the latest update for your system and hardware. Check the non-critical updates to see if they can fix your problem.
    • Check to see if you can find a solution to your problem in Google. Also make sure to check out Google Groups.
    Related Articles

    Wednesday, September 28, 2005

    Windows Performance Tips (Hardware)

    Since I just completed a four part article on 'General Windows Maintenance Tips' (part 1, part 2, part 3, part 4), now I am going to cover some tips for increasing your systems performance. The maintenance tips that were provided in the previous articles can help speed up your computer, but if you want to see a real boost in your system's speed then you have to invest in some hardware.
    • RAM vs. Virtual Memory: When RAM was very expensive, a technology was created called 'Virtual Memory'. The way it works, is that the Operating System (OS) sets a side a chuck of hard drive space, then as the physical RAM gets full it swaps out chunks of memory to the hard drive that are currently not being used. The great thing about this technology is that if you need the extra memory it can be a life saver, but it comes at a cost. It can really slow down your computer, because the OS has to move data in and out of RAM to the hard drive. By purchasing more RAM for your computer you can see an increase in your computer's performance. I would recommend at least a 1GB of RAM for Windows and your applications.
    • Fast Hard Drives: One of the slowest components in your computer is your hard drive. The main reason why its slow is that its mechanical. Newer high-performance hard drives on the market, have faster interfaces (i.e.: SATA and SCSI3), large memory caches (i.e.: 8MB or larger), high RPM spindle speeds (i.e.: 10,000 RPM and faster) and access times. If you get a fast hard drive, you should also invest in a fast hard drive controller. If you have at least two hard drives, and the right controller you can create a RAID 0 array which can give you an extra performance boost.
    • Faster CPU: Another way to increase your system performance is to install a faster CPU with a large L2 cache on your computer. You need to check if your computer's motherboard can support a faster CPU then the one that is currently installed on it. A faster CPU will let you process more information quickly. Note: If you buy a faster CPU, you might want to also consider buying faster RAM if your motherboard and CPU support it.
    • Fast Video Card: If you're a gamer, engineer, or run any application that's used for creating realistic graphics then you might want to consider investing in a fast video card. New video cards are coming out all the time, that are faster and have more features then the previous generation. What you want to consider when buying a new video card is, make sure that it has a fast GPU (Graphics Processing Unit), 128MB or more of fast video RAM, and can use a fast APG or PCI-X slot.
    This article only briefly covers at a high level the hardware that is available to make your system run faster. You need to research carefully each type of hardware change you want to make to your system.

    Sometimes, when you change one component in your system, you can have a domino effect where you need to change other components as well. For example, some of the changes listed above could require a new motherboard, or power supply.

    If price is a consideration, try buying the previous generation of a technology to get more bang for your buck.

    Monday, September 26, 2005

    Windows Security Tips (Part 2)

    In the previous tip, we talked about running your computer with a 'restrictive user account' that doesn't have administrator privileges. The only problem with running your computer this way, you will soon discover that there will be times that you need these rights to perform certain operations.

    To do this, you can use the 'Run As' command, to perform administrator tasks even if you're logged in with a restrictive user account. To access this feature, right-click any program icon and select 'Run as...". A security dialog will display, click 'The following user' radio button, then enter the administrator usrename and password.

    For more information see the following Microsoft Knowledge base article: 'How to enable and use the "Run As" command when running programs in Windows' (294676).

    Sunday, September 25, 2005

    Windows Security Tips (Part 1)

    For your protection, its not a good idea to always run your computer using an account that is privileged (i.e: with administrator rights). By doing this, you can prevent malicious programs from being able to easily infect the OS because it doesn't have the rights.

    When you have to perform an operation that requires privileged access, such as installing or configuring an application or OS. That is when you login with the administrator account.

    To add or remove users, or change user account privileges open the User Accounts control panel. To use this control panel does require administrator access.
    • Open the Control Panels folder
    • Double-click the User Accounts control panel

    Friday, September 23, 2005

    Lock Your Windows Quickly

    Computer security has been a hot topic for a few years, and a good security practice is to lock your computer when you walk away from it. One of the quickest ways to lock your computer's screen is press the WinKey+L key (if your computer keyboard doesn't have the WinKey, then you can press the Ctrl-Alt-Del keys, then Enter). When you lock your computer's screen, you will be required to enter your log-on password to access your computer again (or have an administrator password).

    Wednesday, September 21, 2005

    Powering Down or Standby, Which One?

    Normally when you're done using your computer, you shut it down. Then when you need it again, you turn it on, and load all your applications to start working on it. There is nothing wrong with this scenario, but there is a different way to shutdown your computer.

    This feature is called hibernate, this is where the OS writes the contents of RAM to the hard disk and turns off the computer. Then when you turn on the computer again, you are able to continue where you left off.

    The advantage of this using hibernation over the standard shut down procedure should be clear. Although, I would recommend that you reboot every few days just to allow Windows to perform some house keeping.

    To put your computer into a hybernation state, under the Start menu select 'Turn Off Computer'. When you see the dialog with the 'Stand By', 'Turn Off', and Restart buttons, hold down the Shift key. The 'Stand By' button will change to Hybernate.

    This doesn't happen you have to turn on this feature:
    • Open the 'Power Options' control panel.
    • Click on the Hibernate tab.
    • Check the 'Enable hibernation' checkbox.
    • Press the OK button when done.

    Running programs from your USB flash drive (Part 2)

    One technique that I have used successfully to run utilities that come with their own installer from my USB flash drive. I run the installer application and install it on my local hard drive. I then copy the program's folder out of the C:\PROGRAM FILES folder to the USB drive. I then uninstall the original program from the computer.

    To test the program, I try to run it from the USB flash drive. The uninstall technique will let you know if the program has any dependencies (such as DLLs, or registry entries) that will prevent it from running properly on another computer.

    Finding Programs for your USB Drive
    There are sites on the Internet that host programs that can be run from these devices, for example there is TinyApps.org and Roadkil.net. These sites contain several different types of useful utilities and other miscellaneous programs.

    Tuesday, September 20, 2005

    Running programs from your USB flash drive (Part 1)

    Installing and running programs from your USB flash drive, can be a hit and miss proposition. You need to find programs that don't have dependencies on being fully installed on to a computer's hard drive in order to run.

    For example, Microsoft Office can not run from a USB flash drive. When the application is installed, it installs its support files all over the computer's hard drive for various reasons (which I don't plan to discuss). Microsoft Office is not the only program that has this requirement, several other applications from several different vendors can't be run from a USB flash drive.

    The real trick is finding programs that don't have installation dependencies in order to run. These programs are primarily written by small software vendors and can come in all shapes and sizes. I generally classify these programs in to two groups, ones that don't require a folder structure to run and ones that do.

    There are some programs that all you have to do is copy one or two files to the USB drive and its ready to go. There are other programs that require their own folder structure to run. A lot of the time the only thing you can do is copy the program files to your USB drive, and try to run it.

    Sunday, September 18, 2005

    Deleting Entries out of IE's Autocomplete Feature

    If you have the Internet Explorer with the Autocomplete feature enabled in your browser, you will discover it comes in handy when trying to complete web forms where you have to enter data that you have already entered. Although if you mistype an entry in to the web form, that mistake will display everytime you use a web page with a particular fields on it.

    For example, I use Google to find the proper spelling of words. Although I hate seeing those mistyped entries everytime I do a search.

    There are two ways to delete items from the Autocomplete feature. One, delete all the entries in Autocomplete (sometimes this is good to do anyway for privacy reasons). Two, delete a single entry from a particular field. For example, go to favorite web site that has a field on it (i.e.: Google) then type any letter. If IE's autocomplete feature is enabled, you will see all the words/phrases that you have searched for that start with that letter.

    To delete an item it the Autocomplete list:
    • Goto the web site, that has the field that contains the entry you want to delete
    • Use the up or down arrow keys to select the entry, then press the Delete key (Note: I don't mean the Backspace key).
    If you type that letter again, you should not find the entry listed anymore.

    Friday, September 16, 2005

    PhotoFiltre (Free Image Editing Program)

    There are only a few free good image editing programs available on the Internet in my opinion. Some of these programs are easy to use but have limited functionality, and others are more powerful but the complexity of using the program increases.

    One you might want to check out is PhotoFiltre, it’s powerful and easy to use. Here is an excerpt from their web site: "PhotoFiltre is a complete image retouching program. It allows you to do simple or advanced adjustments to an image and apply a vast range of filters on it. It is simple and intuitive to use, and has an easy learning curve. The toolbar, giving you access to the standard filters with just a few clicks, gives PhotoFiltre a robust look."

    Registration
    PhotoFiltre is free for a private, non-commercial or educational use (including non-profit organizations). Commercial or professional use requires registration.

    Thursday, September 15, 2005

    General Windows Maintenance Tips (Part 4)

    This is part 4 of the 'General Windows Maintenance Tips' article.
    • Removing Startup Programs: Some applications you installed can come with components that are designed to load in the Notification Area, or in the background as a service when Windows starts up. If you use these services a great deal, then it might be to your advantage to have this software run this way. Although, if you use these services once in a great while, then all these programs are doing is wasting system resources (like: memory and CPU cycles), making your computer run slower, and taking longer to fully boot up. On my personal systems, I really try to prevent these programs from loading if I don't need them. To help manage these startup applications Microsoft includes a utility called MSCONFIG which is designed to allow you to temporarily prevent these programs from loading for diagnostic reasons. Note: to permanently prevent these programs from loading requires removing their entries from the Windows registry. Warning: Disabling certain system services and startup applications, can disable Windows functionality. Use this tip at your own risk. Although, the good news is that MSCONFIG doesn't allow you to delete permanently these startup items. A good resource for managing system services is Black Viper Service Configuration page. To manage Startup application, check out PacMan's-Portal or AnswersThatWork.
      • From the Start menu, select Run...
      • Type "MSCONFIG" and press the Enter key
      • To disable startup services, select the Services tab. To disable startup applications, select the Startup tab.
      • Select the items that you want to prevent from loading, then press the OK button
    • Cleaning The Registry: When you install applications on your computer it places new files on the hard drive, and new entries in the Windows registry. Later when you uninstall an application, it may not remove all of its files from the hard drive, or its registry entries. To help find and remove these orphaned registry entries, there is a free utility called RegSeeker. It can scan your computer for these left over registry entries and remove them. Warning: Deleting registry entries even with specialized utilities can disable Windows or your applications. Use this tip at your own risk. It is also highly recommended that you backup your computer before using these utilities.

    Wednesday, September 14, 2005

    General Windows Maintenance Tips (Part 3)

    This is part 3 of the 'General Windows Maintenance Tips' article.
    • Hard Drive Maintenance: To prevent data loss on your hard drive, you need to check it to make sure that there is no damage to the file system, and you don't have bad sectors on it. Sometimes the file system which stores and retrieves the files from the hard disk can get damaged from system failure, power losses, or some other type of failure. Windows includes some basic utilities to scan the file system and repair the damage it finds. Note: More sophisticated disk utilities are available from 3rd party software developers, such as: Norton SystemWorks, or System Mechanic Professional.
      • Open My Computer under the Start menu
      • Right-click on the C: drive icon, select Properties.
      • Select the Tools tab
      • Press the 'Check Now...' button, in the 'Error-checking' section.
      • Then check the 'Automatically fix file system errors' and/or 'Scan for and attempt to recovery of bad sectors' checkboxes.
    • Defragmenting Your Hard Drive: To help increase your system's performance, you can defragment the files on your computer's hard drive. The defragment process organizes the files on the hard drive so that they can be quickly read into the computer's memory. Its a good idea to delete temporary files, and empty the trash can before running this utility. Note: There is some debate to how much of a performance increase you will get by defragmenting your computer's hard drive. All I am going to say is that you need to make your own determination.
      • Open My Computer under the Start menu
      • Right-click on the C: drive icon, select Properties.
      • Select the Tools tab
      • Press the 'Defragment Now...' button, in the Defragmentation section.
      • Press the Analyze button to see how much disk fragmentation your hard drive has, press the Defragment button to defragment the drive.

    Tuesday, September 13, 2005

    General Windows Maintenance Tips (Part 2)

    This is part 2 of the 'General Windows Maintenance Tips' article.
    • Remove Unused Software: Generally the older your computer gets, the more older software builds up on it that may never be used. These programs could come from Internet downloads, blotware that came as part of other software, and a million other places. These older programs are just sitting idle on your computer there taking up disk space, and cluttering up the All Programs menu. Depending on the type of software that was installed, these programs can also consume system resources (like memory, or CPU time) which can slow down your computer, or even make it unstable. To remove this software follow the instructions below:
      • Open the Control Panels folder
      • Open the Add/Remove Software control panel.
      • Look for programs that you don't use or want anymore, click on the entry, then press the Remove button. Most of these program will include a wizard to walk you through the software removal process.
      • Close this control panel when you're done.
    • Delete Temporary Files: Sometimes Windows or other programs create temporary files that are left behind on your computer consuming disk space. These programs can leave these files behind because there could be flaws in the software, or the program was not shutdown properly. If your hard drive is getting full, this can cause your system to slow down or behave erratically. A low disk space condition will prevent Windows from writing critical system information to the hard drive (such as the paging file). To remove this unneeded disk space, perform the following steps:
      • Open My Computer under the Start menu
      • Right-click on the C: drive icon, select Properties.
      • Press 'Disk Cleanup' button. This will launch a utility that can be used to remove these files.

    Sunday, September 11, 2005

    General Windows Maintenance Tips (Part 1)

    Computers like cars require some general maintenance to keep them running properly and in peek performance. If you don't maintain and change the fluids in your car it could fail on you. If you don't properly maintain your computer, it can also fail on you.

    Below is a list of ideas that you can use to help make your computer run better:
    • Run Windows Update: It is critical these days to keep your system and applications up-to-date with the latest patches. These patches are designed to correct known problems and security holes that can expose your system to different types of exploits. These security holes can be used by malicious software programmers to takeover your system, steal your personal data, and more. Note: If you enable Windows XP Automatic Update, it can automatically download and install critical updates for you.
    • Check for Malicious Software: Check your system for spyware, viruses, or other types of malicious software running on your computer. Even though you might be running anti-virus and anti-spyware software sometimes these programs can sneak past the resident scanners running on your computer. It is also a good idea to make sure that your signatures are up-to-date, and run scans of your system at least once a week.

    Friday, September 09, 2005

    Make the Caps Lock Key work like a Typewriter

    There are some functionality of the older typewriter keyboards that some people would still prefer to use over the more modern PC keyboard. For example, when pressing the Shift key on the typewriter keyboards, it would deactivate the Caps Lock key. If you hold down the shift key on a modern PC keyboard while the Caps Lock is on, all it does is allow you to type in lowercase letters.

    If you would prefer to use the older keyboard functionality in Windows XP, do the following:
    • From the Start menu, select Control Panel
    • Double-click the 'Regional and Language Options' control panel
    • Click the Languages tab
    • Press the Details... button.
    • Press the 'Key Settings...' button
    Note: If the 'Key Settings...' button is grayed out, press the Add button and add another keyboard definition. Select the keyboard you want to use and then press the 'Key Settings...' button.
    • In the section called 'To turn off Caps Lock', select 'Press the SHIFT key' radio button.
    • Press the OK buttons until all the dialogs are closed.
    Now whenever you press the Shift key it will disable the Caps Lock key if it is enabled. To re-enable the newer functionality, just repeat the instructions but in the second to the last step just select the other radio button.

    Thursday, September 08, 2005

    Keyboard shortcuts that you might not know...

    Below is a list of keyboard shortcuts that you might not be aware of:
    • Bypassing the Recycle Bin when deleting a file, highlight a file or folder and press the Shift-Del keys.
    • Quickly access a file or folder's properties dialog, highlight a file or folder and press the Alt-Enter keys.
    • Quickly expand all folders in the Windows Explorer, highlight a folder and press the Shift-Numeric Keypad Asterisk.
    • Automatically size all columns in the Windows Explorer, press the Ctrl-Numeric Keypad Plus.
    • An alternate way to quickly access the start menu press the Ctrl-Esc keys. This is handy if your keyboard doesn't have the Windows key on it.

    Wednesday, September 07, 2005

    Windows Network Troubleshooting Utiltiies

    Troubleshooting network problems can be a royal pain in the behind. Like any form of computer troubleshooting, there are a lot of layers of other technologies that you might have to dig through to isolate the problem. Then even after you isolate the problem, it might be beyond your control to correct (such as a problem at your ISP).

    To help you troubleshoot and identify problems, Windows includes some basic network diagnostic utilities. These utilities do require that you have an understanding of how networks operate in order to use them.

    You need to access these utilities from the command line in order to use them. So from the Start menu, select Run..., and type "CMD" and press the Enter key.
    • ipconfig /all shows your computer's IP-related settings. This information will tell you if your computer is configured correctly for communicating on your network.
    • ping [ip_address] (i.e.: ping 192.168.1.100) allows you to check your connectivity with other devices on your network by using that device's IP address. This test can tell you if you can talk to other devices on your local and/or external network. If you get a response, you can assume you have basic network connectivity to that remote device. Note: the remote devices your trying to communicate with must support this functionality.
    • tracert [ip_address] (i.e., tracert 192.168.1.100) shows how many routers (AKA hops) a packet must travel to reach a remote device. This utility is great for finding out where there might be a communication failure between you, and the device you're trying to reach.
    • netstat show you a list of all the active TCP/IP ports on your system. This information is handy for detecting which processes running on your computer are talk to the network.
    • nslookup [DNS_name] (i.e. nslookup yahoo.com) displays the IP address related to a device's domain name. This utility can let you know if your computer can communicate with its remote DNS server.
    There are several more network utilities that are avilable, but these are the ones that you will use the most.

    Tuesday, September 06, 2005

    Buying a USB Flash Drive (Part 2)

    In part one of this article, we talked about the technology behind the USB flash drives. Now we’re going to talk about the different physical aspects and features of these drives.

    These drives can come in all sorts of different shapes, sizes, and storage capacities; here is a list of things that you should consider before buying one.
    • Buy a drive with a small form factor, my general rule of reference is that it should not be bigger then a pack of stick gum (for example: check out the SanDisk Cruzer Mini). Avoid buying drives that have funny shapes to them. For example, there are a few drives that I have seen that have a round bulge on the end. The drives with odd shapes can prevent you from inserting it in computers where USB connectors only offer enough room to insert another cable.
    • Buy the highest capacity USB flash drives you can afford. A one gigabyte flash drive is now under a hundred dollars.
    • Buy the fastest USB flash drives you can afford. Most modern USB flash drives support USB v2.0, which can support transfer rates as high as 480MB per second, while USB v1.1 only supports 11MB per second. Make sure to read the packaging carefully before you buy it, to make sure it supports USB v2.0.
    • Two other important considerations that are often overlooked are how you’re going carry the drive, and the type of cap that is used to protect the USB connector. I like to keep my USB attached to my key ring, but I had to modify the tether that came with my drive. The one thing I really hate about my drive is the protective cap. It keeps following off, and I have lost a few of them.
    • Some drives come with extra software to perform special tasks such as encrypting your files. Manufactures do this to try to differentiate their drives from the competition. I generally delete this software because it is either trailware (that only works for thirty day), or it’s a poorly designed custom.

    Monday, September 05, 2005

    Buying a USB Flash Drive (Part 1)

    It’s not news to anyone that the floppy disk has been replaced by the USB flash drive for a few years now. Plus, these drives are getting cheaper, smaller and coming in larger storage capacities all the time.

    Personally, I have been carrying a USB flash drive around with me for a few years now. I mostly use it to carry large files between two different computers and to store software utilities that I use to fix different problems that I encounter. Although I have to admit I don’t use it too often, but when I need it, it’s a godsend.

    For those of you who are wanting to buy one of these types of drives, and are researching them. There are a few things that you should know:

    • There are two types of USB drives on the market, hard drive and flash based.
      • Hard drive based USB drives, offer larger storage capacities for less money. Although, they’re generally larger in physical size when compared to a flash-based drive and require and external power supply to use them.
      • Flash-based USB drives don’t generally have large storage capacities, but they’re smaller and more compact, and don’t require an external power sources.
    • These drives can be automatically mounted by most modern OSes without the use of special software drivers. All you have to do is plug them in, and wait for them to mount (this generally requires a few seconds). This means that you can plug it into just about any computer running Windows 98SE (or higher), Linux, or the Mac OS v9.1.x (or higher).

    Note: It is a good idea to unmount the USB drive before pulling it out of your computer. This makes sure that no applications are using the drive before you pull it out of your system, this help protect against data lost.

    Friday, September 02, 2005

    Fine Tuning Your Monitor

    Windows by default will try to auto-discover the correct resolution and refresh rate for your monitor. If its unable to figure it out, it will default the the monitor to a moderately high refresh rate (85Hz) for CRTs and a lower refresh rate (60Hz) for LCDs (note: LCD monitors are not effected by refresh rates, so by setting the refresh higher then 60Hz can slow down the graphics).

    If you need to manually adjust your CRT monitors resolution, color depth, or refresh rate you need to access the Display properties control panel (note: for LCD monitors don't change the native resolution).
    • Right-click on an empty area of the Desktop, and select Properties
    • Click the Settings tab
    • From here you can set the monitor resolution and color depth by adjusting the slider or changing the dropdown menu.
    • Press the Advanced button, and select the Monitor tab
    • Form here you can adjust the monitor's refresh rate. For CRT monitors, a general rule of reference, make sure its set faster the 60Hz to avoid seeing flicker on the screen. Check your monitors manual to find out what refresh rates it supports. Be careful not to refresh rate that is too high this canoverdrive your monitor, and could possiblily damage it.
    • Press the OK buttons when done.

    Thursday, September 01, 2005

    Making Windows Readable on Large Monitors

    It seems the older you get, the harder it gets to read the small type on the monitors that support fairly high resolutions (such as: 1280x1024 and higher). If you're below 25 years old and have really good eye sight and laughing at me for saying this just give it a few years. ;-)

    If I use a monitor below 17" inches at this resolution, I begin to squint to try to read the display (I am sure I am not the only one who has to do this). If you do have to drive your monitor at a high resolution because you like the extra screen real estate, but hate the tiny fonts in the dialogs and menus. There is a solution that can fix most of your problems, although its not a 100% fix.

    Windows has two features that support making the fonts in menus, dialogs, and more easier to read by making them bigger. The first feature only makes the fonts bigger:
    • Right-click on an empty area of the Desktop, and select Properties
    • Click the Appearance tab
    • In the Font Size drop-down menu select one of the following options (Normal, Large, or Extra-Large).
    • Press the OK button when done.
    If you want to make everything bigger on the screen (not just fonts), instead of choosing the Appearance tab, choose the Settings tab. Press the Advanced button, then in the DPI setting drop-down choose 'Large Size (12o DPI)'. This will make everything on the screen 25% bigger.

    Note: By changing this setting you will notice that elements of some applications will not display correctly (such as words spilling outside the display list boxes, or not aligning properly).

    Tuesday, August 30, 2005

    Fixing Firefox Memory Leaks

    Have you discovered that Firefox consumes a huge amount of memory? Open the Task Manager, and see how much memory its really using.

    Some people believe this problem is caused by the Flash plug-in, but I have not been able to verify this. To solve this problem, they're suggesting that you remove this plug-in. In my humble opinion this is not an option, too many web require this plug-in in order to use it.

    To help prevent this problem from happening, you can try to make a change to Firefox's configuration. This change prevents the browser's cache from getting too big.
    • In the Firefox location bar, type "about:config" and press the Enter key.
    • Right-click anywhere in the browser windows, and select 'New>Integer'.
    • In the Value dialog type "browser.cache.memory.capacity", press the OK button
    • In the Value dialog, enter the maximum amount of memory you want to allow Firefox to use (i.e.: 65000), press the OK button.
    • Restart the Firefox browser.

    Monday, August 29, 2005

    Windows Logo Key Shortcuts

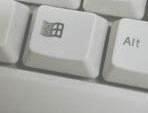
    Does your keyboard have the Windows logo key (I like to call it the WinKey) on it? Did you know that you can use this key to perform specific actions quickly? For example, you can use it to display the Run... dialog, locking the screen, and more.


    Below is a complete list of all the WinKey keyboard shortcuts that I am aware of:

    WinKey (by itself): Opens the Start Menu.
    WinKey+F1: Displays the Windows Help and Support Center.
    WinKey+Pause/Break: Displays the Systems Properties control panel.
    WinKey+Tab: Cycles through the application in the Taskbar. If you hold down the Shift+WinKey+Tab will reverse direction of the cycle.
    WinKey+D: Minimizes all open windows and shows the Desktop. If you press the key again it will restore the windows to their previous positions.
    WinKey+E: Opens a Explorer Window.
    WinKey+F: Displays the file search window.
    WinKey+L: Locks your computer (similar to Ctrl-Alt-Del in previous version of Window).
    WinKey+M: Minimizes all open windows and shows the Desktop. The Shift+WinKey+M restores the windows to their previous positions before they were minimized.
    WinKey+R: Displays the Run... command dialog.

    Stopping Firefox Pop-ups

    Like millions of other people, I am a big Firefox fan. I always find myself futzing with the program to make it run better, faster or become more usable. Although, over the last few months I have been noticing an increasing amount of pop-up windows being displayed.

    Firefox supports pop-up window blocking, but for some reason these windows not getting blocked and they're being displayed. I am not against web sites that use pop-up windows to enhances its functionality. Although my views change when they're used for advertising. These windows are just annoying!

    Well here is a tip to help prevent these pop-up windows from being displayed. It appears that some web site developers are leveraging the Flash plug-in to display these windows. Fortunately, there is a away to prevent this from happening:
    • In the Firefox location bar, type "about:config" press the Enter key.
    • Right-click on the page that is displayed, then in the context menu select 'New > Integer'.
    • In the dialog box that is displayed, type 'privacy.popups.disable_from_plugins' in the field, then press the OK button to continue.
    • Enter the value 2, then press the OK button to finish.
    The possible values are:
    • 0: Allows all pop-ups from plug-ins.
    • 1: Allows pop-ups, but limits them to dom.popup_maximum.
    • 2: Blocks pop-ups from plug-ins.
    • 3: Blocks pop-ups from plug-ins (even for white listed sites).

    Friday, August 26, 2005

    Free Open Source Educational Programs, and Games and Simulators

    Did you know about all the different types of high-quality free and open-source educational programs, games, and simulators that are available on the Internet? There are several different types of applications that are available for you to download.

    The quality of these applications will vary from program to program, but most of them are really good. Here is a real short list of some of the good ones I am aware of:

    Applications


    • TuxTyping - A typing tutor for children starring Tux, the Linux Penguin.
    • Tux Paint - A drawing program for young children, that provides a simple interface.
    • LeoCAD - A CAD program that uses bricks similar to those found in many toys.
    • Lincity - Build and maintain a city.

    Simulators

    Wednesday, August 24, 2005

    Run Older Program with Windows XP

    Do you have a lot of old programs, like classic games that use to run on Windows 95 but no longer run under Windows XP? There is a solution to your problem, XP has a compatibility mode that allows you to run your older software.

    To access this compatibility mode you need to access the programs properties, then you can configure these settings.
    • Right-click the program icon, and select Properties.
    • Click on the Compatibility tab.
    • Check the 'Run this program in compatibility mode' checkbox.
    • From the dropdown list, select the operating system (Windows 95, 98/ME, NT (SP5), 2000) that the program ran under best.
    If necessary, you can also change the display settings (i.e.: colors, resolution, visual themes), and input settings. When you're done save the setting by press the OK button.

    The next time you click on the program, it will be running in Windows compatibility mode.

    Note: Don't expect your older programs to run without problems while running in this mode, its not perfect emulation by any means.

    Free and Open Source Games (Updated)

    Tired of spending a fortune on new games, or have an older computer that can't play the most modern game. There are literally hundreds of free and open source games available on the Net. Some of them are crap, but here is list ones that are not.

    Open Source Games
    • Trackballs: A marble game inspired by the 80’s Atari classic Marble Madness.
    • BZFlag (Battle Zone capture Flag): A free multi-player multi-platform 3D tank battle game.
    • glTron - Steer a light cycle, leave behind a wall.
    • Airstrike - 2D dogfighting game.
    • Enigma - Control a small black marble and have to find and identical Oxyd stones.
    Strategy Games
    • Stratagus - A cross-platform real-time strategy gaming engine.
    • ASC (Advance Strategic Command) - A turn based strategy game.
    • FreeCiv - A clone of the Civilization II multiplayer strategy game.
    • TORCS - Free 3D Racing Car Simulator
    • Hexen2: Hammer of Thyrion - First person shooter game
    Here is a list of classic games that are being given away for free from their manufacturer.

    Free Classic Games

    Monday, August 22, 2005

    Google Talk

    Google Talk is Google's new IM (Instant Messenger) service that is now available. The new service allows you to call or send IM messages to your friends around the world. Other features include your Gmail contacts are also automatically pre-loaded into Google Talk.

    Google is committed to using open standards, that is why they support the same open protocols that other IM clients use such as Trillian, GAIM, and iChat do. For right now, if you want to talk to your friends on ICQ, Yahoo, or MSN with the new Google Talk client its not supported at this time.

    Here are some resources to answer your questions about Google Talk:

    Sunday, August 21, 2005

    Free Anonymous Browsing Sites

    There are several free sites on the Internet that allow you to protect your online privacy when visiting other web sites. The web sites are called 'anonymous proxy', which means that they act as a middleman and request the web page for you. These sites can help prevent other web sites from collecting personal information about you, such as: browser type, computer type, country, IP address, and more.

    This web page is a good example of what a web site can find out about you when you visit it. This site will show where your IP address is originating. This allows web site owners and web advertisers to target advertising and track your browsing habits. Note: If you use a national ISP there is a good chance that this information will not display correctly.

    If you want to see other information that web sites can find out about you, check out this web page on the Anonymizer site. It gives a good example of information that can be leaked (this is by design) by your browser.

    Disclaimer: The information provided on this page comes without any warranty whatsoever. I do not recommend or endorse any of these web sites, contents, or practices. Use these sites at your own risk!

    Note: Most of these web site employ some type of advertising that is displayed on the web page your visiting, or offer a fee-based premium service.
    • Anonymizer (This site is the grand-daddy of all anonymous browsing web sites. It's not a free service, but I will give it an honorable mention.)
    • The-Cloak (This site provides the most sophisticated controls, but maybe be too complex for users who don't understand the technology.)
    • Anonymouse (Provides very basic anonymous surfing, but the least intrusive interface.)
    • The VirtualBrowser (This site can block: cookies, scripts, HTTP referrer information, and more.)
    • Proxify (Provides SSL anonymous surfing. This site can block: ads, cookies, scripts, and HTTP referrer information.)
    • SurfShield.net (This site can block: cookies, scripts, and HTTP referrer information.)
    • Guardster (Provides very basic anonymous surfing)

    Friday, August 19, 2005

    Activate the Language Bar

    Do you need to switch between different languages for your keyboard? If so, you can do this quickly by activating the language bar. Just follow the instructions below to activate this feature:
    • From the Start menu, and select 'Control Panel'.
    • Double-click the 'Regional and Language Options' control panel.
    • Click on the Languages tab.
    • Click the Details button.
    • In the Preferences section (look at the bottom of the dialog, press the 'Language Bar...' button.
    • Check the 'Show the Language Bar on the desktop'.
    Note: If the 'Language Bar...' button is grayed out, click the Advanced tab and make sure the checkbox "Turn off advanced text services" is unchecked. If this box is checked, it will turn off the language bar option.

    Thursday, August 18, 2005

    Keyboard Shortcuts for Internet Explorer

    If you use the Internet Explorer as your primary browser, here are some keyboard shortcuts that will hopefully make your life easier.
    • Alt+D: Select text in the current Address bar.
    • Alt+Home: Displays your Home page.
    • Alt+Left Arrow or Backspace: Move back a page (in the browser cache).
    • Alt+Right Arrow: Move forward a page (in the browser cache).
    • Ctrl+B: Organize Favorites.
    • Ctrl+C: Copies selected data to the clipboard.
    • Ctrl+E: Displays the Search bar.
    • Ctrl+Enter: Adds "www." to the beginning and ".com" to the end of the text in the Address bar.
    • Ctrl+F: Displays the Find dialog.
    • Ctrl+H: Displays the History bar.
    • Ctrl+I: Displays the Favorites bar.
    • Ctrl+L or Ctrl+O: Displays the open Web page, document or folder dialog.
    • Ctrl+N: Opens a new browser window.
    • Ctrl+P: Displays the Print dialog to print the active frame or current page.
    • Ctrl+R or F5: Refreshes the current page.
    • Ctrl+S: Saves the page as a file.
    • Ctrl+V: Pastes the data in the clipboard.
    • Ctrl+W: Close the current browser window.
    • Esc: Stops downloading the current page.
    • F1: Displays the Internet Explorer help window.
    • F11: Switches between full-screen and regular view mode of the browser window.
    • F4: Expands the Address bar to display all the recently entered addresses.
    • Shift+F10: Displays the context menu of a link.
    • Shift+Tab: Moves back through the Address bar, Links bar, and the items on the Web page
    • Tab: Moves through the Address bar, Links bar, and the items on the Web page

    Monday, August 15, 2005

    Windows Error Reporting (Part 2)

    In part one we talked about WER (Windows Error Reporting), now we are going to explore other options that you have for viewing this information. This is a great trick for viewing critical errors even if you have disabled WER. Another great feature of this tool is that its a great place to quickly find and view how many types of critical errors your system has encountered.

    To see this information, do the following:
    • From the Start Menu select All Programs | Accessories | System Tools folder, then select the System Information program.
    • Expand the 'Software Environment' node, then click on 'Windows Error Reporting' (see the picture below).

    Windows Error Reporting (Part 1)

    When a program crashes in Windows XP, a dialog box is generally displayed asking if you want to send your crash report to Microsoft. This dialog is part of a new feature added to XP called 'Windows Error Reporting' (WER). WER can send detailed reports to Microsoft when a program crashes. Microsoft then uses this information to fix problems, they also report issues they find to vendors about errors found in their products.

    In order for a program to use WER it must be specifically written to take advantage of it. Microsoft incorporates this feature in their products and they strongly encourage all developers to do the same.

    Some people are worried about privacy and they have every right to be. Nobody wants any company to have more information about them, then they choose to share with that company. WER can accidentally expose private information (such as: part of a document, machine information, or possible passwords), but it doesn't do this by design. Although, if you want to know more about Microsoft's policy for handling this data, check out this Web page.

    To configure WER options, do the following:
    • Open the Control Panel
    • Open the System control panel
    • Click on Advanced tab.
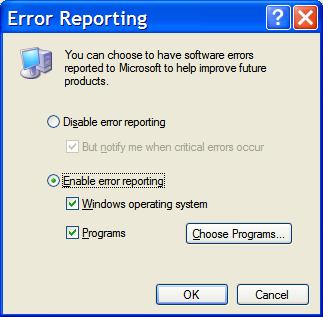
    • Press the 'Error Reporting' button


    This opens the Error Reporting dialog, from here you can disable or enable this feature all together or only for specific applications.

    Note: All reports are transmitted using HTTPS, to prevent someone other then Microsoft from receiving this information.

    Friday, August 12, 2005

    Help Prevent Phishing Attacks

    If the idea of identity theft scares you, you're justified in your concern. It seems like everyday, new types of 'phishing attacks' are being created. If you don't know what phishing attacks are, I will try to explain.

    This is when someone tries to trick you in to revealing your personal information (such as passwords, social security numbers, and more), this is known as a phishing attack. They generally do this by sending you forged emails from legitimate companies that you trust (like: B of A, Citibank, eBay, etc.). These email contain links to a phony web site that looks legitimate. Then when you go to the phony web site, it will ask you to 'verify' your information by requesting you to enter your credit card, social security numbers, user accounts and password, etc.

    Unfortunately, there is no easy way to detect phishing web sites, and they're increasing in their sophistication all the time. Right now, one of the few semi-reliable tools for fighting back against these attacks, are programs that validate the IP address of the web site you're visiting.

    There is a tool from a U.K. company called Netcraft, which has created a free browser plug-in called the 'Netcraft Toolbar' (now available for Internet Explorer and Firefox). Netcraft has compiled a list of known phishing sites from user input (which comes from the toolbar), and its own data.

    When using the toolbar, users are encouraged to report phishing sites that they find. Then, If you attempt to visit a known phishing site, the toolbar will block it and warn you. Other web sites have 'risk ratings' assigned to them, this rating is based on technical factors in the page that may be typical of a phishing web site.

    Thursday, August 11, 2005

    Searching Files and Text (Classic Look)

    When searching for files in Windows XP using the built-in search feature in the Windows Explorer. You might see a little animated character (generally its a dog) in the lower left corner of the window.

    Some people prefer the classic look, which means searching without the animated character. If you like this feature skip this article now, if you don't like this feature read on.
    • The quickest way to access the file search window is by clicking an empty area of the taskbar and pressing F3.
    • Click the 'Change preferences' link.
    • Click the 'Without an animated screen character' link.
    These steps will cause the animated character to disappear. Although, you can bring it back at anytime, just by repeating the steps above.

    Tuesday, August 09, 2005

    Displaying Hidden Files

    Windows XP by default will automatically hide certain file types and folders to protect the operating system. For the average user who doesn't really modify their system defaults, with the exception of the changing the desktop or screen saver, this is a great feature.

    If you're a power user who like to get into the nuts and bolts of the system or you just need to work on it, this feature can be really restrictive. To display hidden files and folders, do the following:

    Note: By displaying hidden files, you can damage or disable the your operating system. Proceed at your own risk. It is also recommended that you have a good backup of your computer's data before making any system changes.
    • Click the My Computer icon under the Start menu.
    • Open the Tools menu, and select 'Folder Options...'.
    • Click on the View tab.
    • Scroll down the list, and select 'Show hidden files and folders' radio button. You might also want to check or uncheck the following items:
      • Check 'Display the contents of system folder' checkbox.
      • Uncheck 'Hide Extensions for known file types' checkbox.
    • Press the OK button to save your changes and exit.
    You should now be able to see all of the hidden files and folders on your computer.

    Burning Files and Folders to CD

    Sometimes it is necessary to copy data off your computer to a removable media, like a CD or DVD. So to handle situations like this, Windows XP comes with CD burning software built in to the Windows Explorer.

    A standard CD can hold about 650 Megabytes, but some newer non-standard higher-capacity CDs can hold more data (i.e.: 700MB+). I have not used this media so I can't offer any advise as far as compatibility with current and older drives.

    To create a CD, follow the instructions below:
    • Insert a blank CD in to your CD recorder drive.
    • Open 'My Computer' under the Start menu.
    • Select the files or folders you want to copy to the CD (To select multiple items, hold down the CTRL key and click the files or folders you want to copy).
    • Then, under the File and Folder Tasks pane, click 'Copy this file', 'Copy this folder', or 'Copy the selected items' (the option will change depending on what items you selected).
    • In the Copy Items dialog box, find your CD recording drive click on it and then press the Copy button.
    • In My Computer, double-click the CD recording drive.
    A window will open, and will show all the files and folders that will be copied to the CD when your ready to commit the files. Double check to make sure that these are all the files and folders that you want to copy. After you write these files to the CD, you can not add or delete these files. If you're using a re-writable CD you will have to reformat the CD and start over again.
    • Under 'CD Writing Tasks' pane, click the link 'Write these files to CD'.
    • The 'CD Writing Wizard' will be displayed, follow the instructions in the wizard.
    Note: If you have low hard drive space you will not be able to write the files to CD. Windows makes temporary copies of all files that you're going to write to the CD on your local hard drive. You will need about a Gigabyte of free space to create a CD.

    Bonus Tip:
    It's useful to check the CD after you finish burning it to make sure that the files copied properly. So to help make this confirmation process easier, you should turn off the feature that automatically ejects the CD when the data transfer process is finished.

    To stop the CD drive from automatically ejecting the CD:
    • Open 'My Computer' under the Start menu.
    • Right-click your CD recording drive, and then select Properties.
    • Click the Recording tab, uncheck the 'Automatically eject the CD after writing' checkbox.

    Monday, August 08, 2005

    Customizing Your Folders Icon and More (Part 2)

    In part one we talked about customizing your folders with different icons and pictures. Now we are going to talk about different actions you can specify to happen when you open the folder. These actions primarily deal with which Explorer view will be selected when you open a folder.

    This feature is handy if you use your folders to organize different types of documents and media. For example, if you have a pictures folder you can set the Windows Explorer to open this folder to the filmstrip view automatically. All you have to do is select the 'Photo Album' option by following the instructions below:
    • Right-click on the folder that you want to customize, and select Properties.
    • Click on the Customize tab.
    • Under 'Use this folder type as a template' there is a drop down menu you can use to specify the type of documents the folder contains. Depending on the option you select, will determine which Explorer view is selected whenever that folder is opened.
    • Once you're done making all your changes, press the OK button to apply your new settings and close the dialog.

    Thursday, August 04, 2005

    Customizing Your Folders Icon and More (Part 1)

    Windows XP allows you to customize your folders with different icons and pictures, and specify specific actions that happen when you open the folder. To customize a folder's icon or picture, you need to access the folder's properties dialog.
    • Right-click on the folder that you want to customize, and select Properties.
    • Click on the Customize tab.
    • To customize the image on the folder with a new icon or picture (note: you can only select one of the two options to customize the folder):
      • To change the icon: press the 'Change Icon...' button on the bottom of the window. You will be presented with a list of icons that you can select. Select the icon that you would like to use. If you can't find one that you like, press the Browse... button, and select a file (i.e.: .DLL, .EXE, or .ICO) that has an icon that you want.
      • To add a picture: press the 'Choose Picture...' button, a standard file selection dialog box will appear. From here you can choose the picture that you want to display on the front of the folder.
    • Press the OK buttons when done.

    Wednesday, August 03, 2005

    Modifying the Send To Menu

    The Send To menu is a very useful context menu. This feature gives you the ability to right-click on any file and perform a specific action, such as sending a file to the desktop or another location. You can also send a file to a blank e-mail, so that it can be mailed to a friend. The options are not limitless, but they're pretty extensive.

    To access the Send To menu, do the following:
    • From the Run... command (Window+R or Start menu, select Run...) type "%userprofile%\sendto" (i.e.: C:\Documents and Settings\[UserName]\SendTo) and press the Enter key.
    From here you can create new folders, shortcuts to applications (such as Notepad), and more. If you create a shortcut to an application, make sure that it can handle those file types you want to send it.

    If you ever want to remove some items from the Send To menu, just open up the folder and delete the shortcuts you don't want.

    Tuesday, August 02, 2005

    Change the Default Launch Application

    Have you ever needed to change the default application used to open a file type (such as an MP3). Follow the steps below to learn how to do this:
    • Open the Windows Explorer or the My Computer icon in the Start menu.
    • From the Tools menu, select 'Folder Options...'
    • Click on the 'File Types' tab, this will display a list of all of the file extensions installed on your computer.
    • From the list select the extension (such as MP3) for which you want to change the default launch application, then press the Change... button.
    • When the 'Open With' dialog displays, select the application that you wan to use to open the selected file type. If you can't find the application, press the Browse... button and find the program that you want to use to open that file type.
    • Press the OK buttons to save your changes.

    Changing the Default File Type Icon

    It is pretty easy to change the default icon for any file type. The hardest part will be choosing the icon you want to use.

    To change the default file type icon do the following:
    • Open the Windows Explorer or the My Computer icon in the Start menu.
    • From the Tools menu, select 'Folder Options...'
    • Click on the File Types tab, this will display a list of all of the file extensions installed on your computer.
    • From the list select the extension for which you want to change the icon, then press the Advanced button.
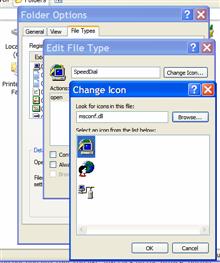
    • Press the 'Change Icon...' button.
    • From the new dialog that displayed, select the icon you want to use or press the Browse... button to select a file that has an icon that you want to use.
    • Press the OK buttons to save your changes.

    Monday, August 01, 2005

    Troubleshooting Monitor Refresh Rate Problems

    Sometimes when trying to adjust the settings on your monitor like the resolution or refresh rate, you can overdrive it. If this happens, the image on the monitor will generally scroll or get really wacky. What happens is your video card is sending a signal to the monitor that it is unable to handle. So the end result is a messed up picture on the screen.

    Windows comes with a safeguard to prevent this from happening. Such as a dialog that pops up asking you if you want to accept the new settings to the monitor after you change it. If you answer Yes it will save the settings, if you answer No it will revert to the previous setting (or if you don't answer the dialog in 15 seconds).

    Although for some reason if your monitor gets locked into a refresh setting that it doesn't support. For example, when changing out an old monitor with a new monitor that doesn't support the older resolution settings.

    There is a way to force Windows to startup in a lower resolution to correct this problem. This feature is called 'VGA mode.' When this feature is enabled, Windows will boot normally with one exception, it will use a basic VGA video driver running the monitor at 640 x 480 resolution with a 60Hz refresh rate.

    To access the VGA mode option :
    • Restart your computer, and press F8 repeatedly as your computer boots
    • On the 'Windows Advanced Options Menu', select 'Enable VGA mode' and press the Enter key.
    Any VGA monitor should be able to handle these settings. Then after the computer finishes booting, go into the Display control panel and make the proper adjustment to the monitor's settings.

    Thursday, July 28, 2005

    Customizing the Explorer Folder View

    When using the Windows Explorer, you will notice that you can view your files several different ways (such as, by: thumbnails, icons, and details). The Details view is the most customizable view, all the columns in this view, can be added/removed, resized, or rearranged.

    To customize the different parts of the Detailed view:
    • Resizing the columns: place the mouse on the vertical line that is displayed between the columns. Click and hold the left mouse button down while you drag the mouse back and fourth to adjust the column size.
    • Add new columns: display more information about your files. Right-click on the column heading and select or unselect the different column headers. Each header will display different types of information (such as: file size, creation date, modification date, etc.).
    • Moving columns: if you don't like the order that the columns are being displayed, you can change it by left-clicking on the column and holding down the mouse button. Drag the column to a new position, then just let the button go when you're done.

    Rolling Back Device Drivers

    One of the several system recovery features that Windows XP includes, is the ability to 'roll back' device drivers. Simply put, that means you can restore the previous device driver that you had installed on your system by pressing a button.

    Now why would you want to do this? There are a few reasons. For example, if your system has been working properly for a long time, and then you decide to install a new device driver to take advantage of a new feature. If that device driver conflicts with something, or is just buggy then by pressing the roll back button, you can restore your previous driver.

    Note: This feature can be accessed in Safe Mode.

    To roll back a device driver to a previous version:
    • Right-click on 'My Computer' and select 'Manage.'
    • Click the Hardware tab.
    • Press the 'Device Manager' and double-click on the device whose drivers you want to roll back.
    • Click the Driver tab
    • Press the 'Roll Back Driver' button.
    Windows will revert to the most recent saved driver after you restart your system.

    Wednesday, July 27, 2005

    Make Your Favorites Web Site Available Offline

    If you have a web site that you like to visit, but you're not always online where you can read it when you want (such as being on an airplane). There is still away to access these sites, and read them while you're not connect to the Internet.

    This feature is called 'offline browsing', and it allows you to store cached versions of the web pages on your local computer so that you can view the site when you want.

    To enable this feature:
    • Navigate to the Web page that you want to make available for offline browsing.
    • From the Favorites menu, select 'Add to Favorites...'.
    • Select the folder where you want to store the shortcut to the web site, but before you press the OK button check the 'Make available offline' checkbox.
    To further customize your offline browsing options:
    • Press the Customize button, then press the 'Next>' button
    • If the Web page contains links, you can make the links available offline by selecting the Yes radio button. From here You can also specify how deep I.E. should go when making copies of these linked Web pages available offline. It is not advisable to set this number too high, because the cached web pages will quickly consume a lot of disk space. Press the 'Next>' button to continue.
    • From here you can specify how you want to synchronize the offline Web pages (i.e.: manually or according to a schedule). Leave the default option selected and press the 'Next>' button.
    • On this page you can specify a username and password if a site requires it.
    • Press the Finish button, then press the OK button in the 'Add Favorite' dialog box.

    Tuesday, July 26, 2005

    Prevent Automatic Program Grouping in the Taskbar

    In XP, similar windows and programs will automatically be grouped together into a single icon in the taskbar. If you don't like this behaviour, you can turn it off pretty easily.
    • Right-click an empty area of the taskbar or the Start button and select 'properties.
    • Click the Taskbar tab.
    • Uncheck the 'Group similar taskbar buttons' option.
    • Press the OK button

    Monday, July 25, 2005

    The 'Send To' Command

    Have you ever used the 'Send To' command? Just in case you have not, the 'Send To' command is a context menu item that allows you to send files to different locations on your system (such as: the desktop, an email message, etc...).

    Just in case you never heard of a 'context menu', that is the menu that is displayed when you right-click an icon in Windows. The context menu selections will change varying upon the object you click on.

    Trying It Out
    Try right-clicking an file on your desktop, you should see a menu item that says 'Send To'. If you select one of the items from the submenu, it will send that object to that location.

    For example, if you're exploring your hard drive and you find a file that you will need to work on it later, you use the 'Send To > Desktop" command. This will place a shortcut to the file on your desktop, so that you can easily access it later.

    Friday, July 22, 2005

    Show Control Panels as a Menu

    You can quickly access the control panel applets from the Start menu without having to open their folder. You can make the control panel applets appear in a submenu (similar to 'All Programs').

    To add this functionality to the Start menu, do the following:
    • Right-click the Start button and choose Properties.
    • Press the Customize button to the right of the 'Start menu' option.
    • Click on the Advanced tab
    • In the 'Start menu items' list box, find 'Control Panel' and select the 'Display as menu' option.
    • Press the OK button twice when done.
    Now when you go under the Start menu, you will see a new submenu called 'Control Panel'. All you have to do is click the menu to open it, then select control panel you want to open.

    Thursday, July 21, 2005

    Making Your Mouse More Responsive

    Have you ever needed or wanted to increase your mouse's responsiveness? It's a pretty easy task to increase the sensitivity of it through its control panel.
    • Open the Control Panels folder from the Start menu.
    • Double-click the Mouse control panel
    • Click 'Pointer Options' tab.
    • Under the Motion section, under 'Select a pointer speed' there is a slider that you can use increase or decrease the overall responsiveness and speed of your mouse.
    • You can check the 'Enhance pointer precision' checkbox to control whether the mouse pointer has an acceleration or deceleration curve to its movements.
    • Press the OK button when done.

    Wednesday, July 20, 2005

    Relocate the 'My Documents' Folder

    Do you need to move your 'My Documents' folder from its default location (i.e.: C:\Documents and Settings\[username]\My Documents) to another drive and/or folder? To change the location of this folder:
    • Right-click on the 'My Documents' icon on the desktop or in the Start menu, and select Properties.
    • In the Target tab, in the field in the middle of the dialog enter the new path for the location your 'My Documents' folder.
    • Press the OK button when done.

    Tuesday, July 19, 2005

    Add the Administrator Tools to the Start Menu

    If you use the Administrative Tools a lot, you can place it at the top level of your Start menu.
    • Right-click the Start button and select 'Properties.'
    • Press the Customize button next to the Start menu option.
    • Click the Advanced tab.
    • In the 'Start menu items' box, scroll down until you find the 'System Administrative Tools' entry.
    • Select the option to 'Display on the All Programs menu and the Start menu.'

    Monday, July 18, 2005

    Quickly Close Multiple Items in the Taskbar

    Have you ever needed to quickly close multiple applications or windows in your taskbar. Hold down the CTRL key and click on each item in the taskbar you want to close. Then right-click on any of the items that you selected and choose 'Close group'. This will close all selected applications and windows.

    Friday, July 15, 2005

    Working With the Briefcase (Offline File Access)

    Windows XP contains a feature called the Briefcase that allows you to synchronize files with just about any type of removable media (such as a USB drive). All you have to do is create a Briefcase on your USB drive, then copy files from your local computer into it that you want to take with you.

    Then when you travel to the remote computer with your USB drive, all you have to do is plug it in, then open up the Briefcase folder and work with the files within it. Then when you get back to your regular computer you can synchronize files again by pressing one button, to keep the files on your regular computer up-to-date.

    Create a New Briefcase
    To create a new Briefcase on a removable media device, connect your USB drive to the computer and open it up. Right-click on an empty area in the new window that opens up and select 'New>Briefcase' in the menu. Double-click on the Briefcase icon, then drag the documents that you want to take with you into the new window that opens up. This will then create copies of your original files, and store them in the Briefcase folder.

    When you need to work on the documents on another computer. Just put your USB drive into that computer, open the Briefcase folder and work on the files within that window. Don't try to move these documents out of the briefcase window or the links to the original files will be lost preventing you from easily synchronizing these files when you get back to your regular computer.

    Synchronizing Your Files
    When you get back to your regular computer, put your USB drive back into it and open up the Briefcase folder on it. You will notice that the status of any file that you changed within the Briefcase folder will show that the file needs updating. Also note that if you changed files on your local computer, but didn't change the files in the briefcase these files will also get updated.

    To synchronize all the files in your briefcase and your local computer, press the 'Update all items' link from the 'Briefcase tasks' section on the left pane of the window. A dialog will display showing which documents need to be updated. To confirm the changes press the Update button to synchronize all the files.

    Thursday, July 14, 2005

    Disabling the Clicking Sound in Internet Explorer

    Some people get really irritated with the constant clicking noise that Internet Explorer makes when navigating through web pages by clicking links. If you want to turn this clicking noise off, it's pretty easy to do.
    • Go to 'Control Panel'
    • Double-click on the 'Sounds and Audio Devices' control panel
    • Click the Sounds tab.
    • Scroll down in the 'Program events' list until you find the 'Windows Explorer' section, then highlight 'Start Navigation.'
    • Change the 'Sounds' drop down menu at the bottom of the dialog to '(None).'
    • Press the OK button when done.
    This will stop the clicking noise as you navigate different web pages.

    Wednesday, July 13, 2005

    Make Firefox Remember Passwords

    Some web sites can include special tag (such as the: autocomplete='off') in their pages to tell browsers not to remember passwords for that site (for example, Gmail and Yahoo Mail). Most browsers honor this tag, and don't ask if you want to remember a password for that site even if you have this feature turned on.

    This can be annoying if you rely on this feature to help you quickly move from web site to web site without having to remember different user names, and passwords. Well, I was frustrated and found a solution to my problem.

    There is a bookmarklet (its a bookmark with some JavaScript in it) that allows you to reset this tag on the web page to allow your browser to remember the password for a site. This bookmarklet has worked pretty well for me the few times I have used it.

    To install this bookmarklet, I would suggest dragging it to your bookmark link bar and leaving it there. Then to use it, when you go to a page that won't allow you to remember the login password, just click on the bookmarklet before you enter your password.

    For your shopping convenience, I have included the bookmarklet here. Just drag the link to your bookmark toolbar and let go.

    Notes:
    • This bookmarklet won't work on every site.
    • If you're going to use the passwords autocomplete feature in your browser, it is highly recommended that you password protect it.
    • Never store passwords to sites that contain financial, or confidential information using the password autocomplete feature. You never know how good the encryption is used to store the passwords.

    Tuesday, July 12, 2005

    Using MouseKeys

    Have you ever come across a Windows computer where the mouse is missing, or not functioning. This can make it extremely difficult to control the computer, even if you use keyboard shortcuts there are things that still require a mouse.

    There is a feature in XP called MouseKeys which is part of the accessibility utilities. This program enables you to use the numbers on the keypad to control the mouse pointer. To activate the MouseKeys functionality, press CTRL + left SHIFT + NUM LOCK keys all at the same time.

    Monday, July 11, 2005

    Increase the Number of Frequently Used Programs Displayed in the Start Menu

    In the Windows XP Start menu, there are generally six program icons in the bottom left section that will change depending on how often you use them. If you have several programs that you use on a frequent basis you might find that you want to increase the amount of icons that can be displayed.

    • Right-click the Start menu and choose Properties.
    • Press the Customize... button to the right of the 'Start menu' option.
    • Change the 'Select an icon size for programs' option to 'Small icons'.
    • In the 'Number of programs on Start menu' set it to a value of "10". This value can be set to whatever you want, but depending on your screen resolution you might not be able to fit more than 15 or more icons.
    • Press the OK button when done.

    Friday, July 08, 2005

    Internet Explorer Favorites in the Start Menu

    Want to add your Internet Explorer's Favorites to the Start menu?
    • Right-click the Start menu, and select Properties.
    • Press the Customize button.
    • Click the Advanced tab
    • In the 'Start menu items' list, scroll down until you reach the 'Favorites menu' check the box.
    • Press the OK buttons
    Now when you open the Start menu, you will see Favorites menu.

    Thursday, July 07, 2005

    Making Windows Run Faster

    Windows XP uses several visual effects such as animation, fading menus and more to try to enhance the user experience. While these graphical effects make Windows look pretty, they require extra CPU processing time and RAM to create them.

    On an older computer which have slower CPUs and less RAM, these effects can slow down your computer. So help improve performance, you might want to try turning some or all the effects off. I am not going to promise a big improvement in your system's overall performance, but it could help.

    To disable these visual effects, do the following:
    • In the Start menu, right-click 'My Computer' and select Properties.
    • In the Properties dialog box, click the Advanced tab.
    • Under the Performance section, press the Settings button.
    Play around with the settings and find which ones give you the best balance of attractive visual effects vs. enhanced performance for your computer.

    Wednesday, July 06, 2005

    Make My Computer use Explore View by Default

    The title of this article might be a bit confusing, but I hope that the next sentence will explain it better. When you open 'My Computer' under the Start menu, it defaults to a task view. This means in the My Computer window when displaying files and folders, on the right there is a set of tasks that can be performed on each item in the window (such as renaming, moving, or deleting a file).

    Some people hate the Task view because it consumes too much screen space that can be used for other things, such as displaying more icons. Personally I really like the Explorer view, this view allows you to quickly access files by expanding and contracting folders by pressing the plus (+) or minus (-) icons next to these icons.

    To make My Computer default to the Explorer view instead of the Tasks view, follow the instructions below:
    • From the Start menu open 'My Computer'.
    • From the Tools menu, select 'Folder Options...'
    • Click the 'File Types' tab.
    • In the 'Registered file types' list, find the item that says '(NONE) Folder' and click on it.
    • Press the Advanced button.
    • Click 'Explore' in the 'Actions list'.
    • Press the 'Set Default' button.
    • Press the OK button.
    • Press the Close button.
    Now every time when you open My Computer, it will open in the Explorer view.

    Tuesday, July 05, 2005

    Windows XP: Using File Compression to Save Space

    If you're running low on hard disk space, you can use Windows XP's built-in file compression feature which is a part of the NTFS file system to get more room. The great thing about this feature is that it automatically compresses and decompresses the files on-the-fly for you.

    To activate file compression on a file or folder:
    • Right-click the item you want to compress, and select Properties.
    • Press the Advanced button at the bottom of the dialog.
    • Check the 'Compress contents to save disk space' checkbox, and press the OK button twice.
    • You will then be prompted to choose to apply the compression to just a file or folder (which includes any subfolders and files within it), then press the OK button to continue.
    Windows will then compress the contents of the file or folder, so this can take a while (this process will take longer on a slower PC). You should notice when you view the file or folder in the Windows Explorer or on the desktop, the text of the item will now be a blue color to indicate that it has been compressed.

    Note: Avoid trying to compress files that are already compressed (such as: audio, image, and video files), this can sometimes create files that are larger then the original.

    Monday, July 04, 2005

    Check Your System If a DVD Decoder is Installed

    Do you want to know if your system has the DVD decoder software installed in it so that you can play DVDs inside the Windows Media Player. To check if your system has this software installed on it, follow the steps below:
    • From the Start menu, select Run..., type "dvdupgrd /detect" and press the OK button.
    This utility will display a pop-up dialog with information about the decoding software installed on your computer. If no software is detected, you will need to install a 3rd party DVD decoding software package. For more information on this subject, see MSKB 306331.

    Sunday, July 03, 2005

    Microsoft RAW Image Thumbnailer and Viewer for Windows XP (New Utility)

    Microsoft recently added a new utility to the Windows XP PowerToys collection, its called the 'RAW Image Thumbnailer and Viewer' . This utility adds new functionality to the Windows Explorer, it allows you to see thumbnails, view the file's meta data, preview, and print photographs stored using the RAW image file format. This is a digital image format that is primarily used by most Canon and Nikon digital cameras.

    Digital photographs stored in the RAW image format are stored uncompressed, meaning that no image quality is lost due to compression (such as JPEG image files). Since these files are uncompressed, they will also be several times larger then the same version of the files that is compressed.

    Friday, July 01, 2005

    Windows XP PowerToys (Part 5)

    Today's featured PowerToys are:
    Power Calculator [Download]
    With this PowerToy you can graph, evaluate functions, and perform many different types of conversions. This is really a very versatile and powerful calculator. To access this utility, go under the 'Start menu|All Programs|PowerToys for Windows XP|Slide Show Wizard'.

    Taskbar Magnifier [Download]
    Magnifies part of the screen and displays it the taskbar. To access this tool right-click an empty area of the taskbar, and then select 'Toolbars > Taskbar Magnifier'.

    Open Command Window Here [Download]
    Adds an 'Open Command Window Here' context menu option on file system folders. This allows you to quickly open a command window at the location of the selected folder. To access this tool right-click a folder, and select 'Command Prompt Here'.